Schedules
Schedules are a powerful tool that allows you to automatically run actions on your server. This could be a backup, restart, or a command.
Setting The Time
There are a couple of things to understand before setting a time for a schedule to run.
The hours are set on a 24-hour clock, ranging from 0 to 23, the scheduled times are set to and run on the UTC timezone, and the last run time for a schedule is shown in your local time. So make sure to take into account the difference between time zones when setting the time.
For example, if you want to set a schedule to run at 6am and you live in the PST timezone. You will need to add 8 hours to the time you wish to set, so the hour you need is 13.
A useful tool for timezone conversions are sites such as WorldTimeBuddy (opens in a new tab). Where you can select different timezones to look at and scan across a line to see the time between timezones.
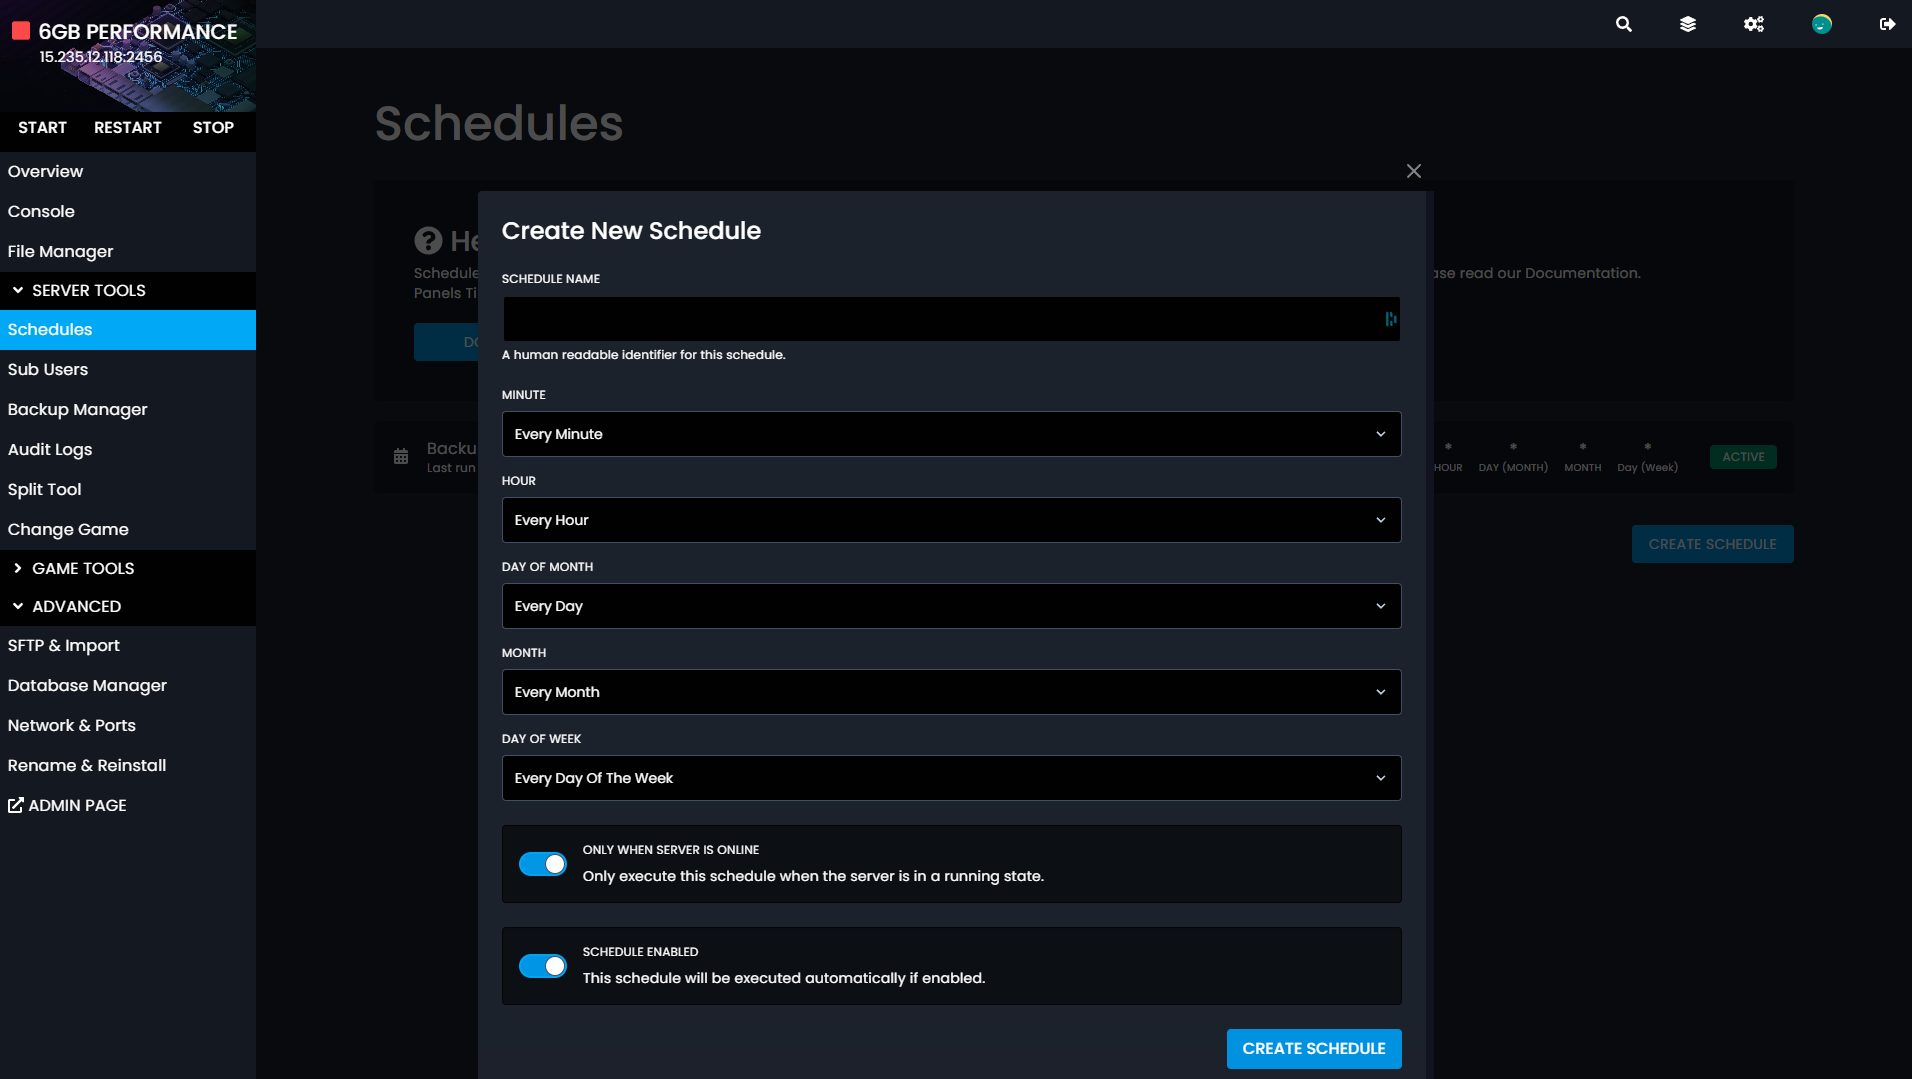
Time Editor Types
When creating or editing a schedule there are two types of time editors that can be used to do so.
The first editor is a Simple editor. The Simple editor contains dropdowns for simple editing of the schedule. While the Simple editor is easier to use, it doesn't allow for the freedom that the Advanced editor does.
The second editor is an Advanced editor. The Advanced editor contains 5 input boxes where specific times can be specified, such as; the months of the year, days of the month, days of the week, hours of the day, and minutes of the hour. Each of these can be used to fine-tune when your schedule runs.
Simple
To set the time the schedules should run in the Simple editor, we can use the drop-downs. These can look a little complex but are easy to understand once you get your head around them.
Let's put them into an example. If we want a schedule to run every 30 minutes. We can set the top box to "Every 30 Minutes", and then leave the rest.
If we want the schedule to run on a single specific time, such as a specific hour, we can select "Manual selection" in the hours dropdown, and then select the hour in the new dropdown to the right of the hours dropdown.
Advanced
To set the time the schedules should run in the Advanced editor, we can specify the times in the input boxes. In each of the boxes, you will need to specify when you want the schedule to run. The times in the Advanced editor are specified using the cron timing format. Each part, such as minutes or hours, has a separate input box.
The character * can be used to specify every unit of time in the specified input box.
The character , can be used to list multiple times for the schedule to run. For example, if you want the schedule to run on the 6th and 12th hours of the day, you can set the hours input box to 6,12.
The character / can be used to specify every other unit of time to run the schedule. The unit set on the right side of / is where the steps start, and the left side is the size of the steps. For example, to run a schedule every 30 minutes between the 0-59 minutes of the hour, you can use 0/30, or you can just set */30 to run every 30th minutes dependent on the hour the schedule will run.
The character - can be used to specify a range of units to run the schedule at. For example, if you want to have a schedule run every day of the month between the 7th and 12th day, you can set the days of the month input box to 7-12.
For a full example, say we want to run a schedule every 5 minutes at 6am on every Tuesday every 2 months, we will want to set the schedule to the following:
Minute: */5 | Hour: 6 | Day (Month): * | Month: */2 | Day (Week): 2
If you are having trouble understanding the syntax of the cron time format. Crontab.guru is a useful site that can be used to get a plain English version of the cron setting. For example, setting the input box to */5 6 * */2 2 will give the output of "At every 5th minute past hour 6 on Tuesday in every 2nd month."
Setting Actions
Now you've set the time, we now need to set the actions. Once you've made the schedule, press on it, and you'll be taken to the task page.
Pressing on the new task button will allow you to set a task for your schedule.
Once the box is open you can select the type of schedules. Commands are game commands, so for Minecraft, if you wanted to say something in the server, you could put the say command. Making sure not to use a / for Minecraft.
Power actions are restart, start, stop, and kill.
Backups allow you to make backups using the backup manager.